

Installing solar panels is an excellent way to gain constant power supply in Nigeria that is not reliant on the grid. This solar panel installation guide covers all processes from planning to maintenance with specific conversation on the unique realities of Nigerian homes and business.
Gaining independence from energy providers is prompting a rise in renewable energy adoption among Nigerians. With proper installation of solar panels, you can forget about power outages and rising electricity prices as you’ll have a steady supply of electricity.
As a homeowner or business owner, you must learn about solar panel installation steps. This will help you make an informed choice. Here’s a step-by-step guide to help you with solar panel installation in Nigeria.
Planning Your Solar Installation
How to Determine Your Energy Needs
Before installing solar panels, you need to calculate your power requirements:
- List all appliances you plan to power with solar energy
- Note the wattage of each appliance (usually found on a label or in the manual)
- Estimate daily usage hours for each appliance
- Calculate daily energy consumption using this formula:Daily Energy (Wh) = Appliance Wattage × Hours Used Per Day
- Sum up all appliances to get your total daily energy requirement
- Add a 20% buffer for system inefficiencies
Just as business planning requires attention to detail, so does planning your solar system’s capacity.
Sample Calculation for a Nigerian Home:
| Appliance | Quantity | Wattage | Hours Used | Daily Energy (Wh) |
|---|---|---|---|---|
| LED Lights | 10 | 10W | 6 | 600Wh |
| Ceiling Fans | 3 | 75W | 8 | 1,800Wh |
| TV | 1 | 150W | 5 | 750Wh |
| Refrigerator | 1 | 150W | 24 | 3,600Wh |
| Laptop | 2 | 65W | 6 | 780Wh |
| Water Pump | 1 | 750W | 1 | 750Wh |
| TOTAL | 8,280Wh | |||
With a 20% buffer, this home needs approximately 10,000Wh (10kWh) of energy daily. Many online calculators can help you determine your exact energy requirements based on your specific appliances and usage patterns.
Selecting the Right Components
Based on your energy needs, you’ll need to select:
Solar Panels: The number required depends on your daily energy needs and available space. For our example home: 10 kWh ÷ 5 sunshine hours = 2 kW of panels (about 7-8 panels of 300 W each)
Solar Inverter: Must handle your peak load For our example home, a 3.5kVA inverter would be suitable.
Battery Bank: Should store enough energy for nighttime use and cloudy days. For our example home: 10 kWh ÷ 0.5 (to avoid deep discharge) = 20 kWh of battery storage (approximately 4 × 200 Ah 12 V batteries).
Charge Controller: Must handle the maximum current from your panels. For our example home, a 60A MPPT charge controller would work well.
Mounting Structure: Must be sturdy enough for Nigerian weather conditions. Options include roof mounts, ground mounts, or pole mounts.
Wiring and Safety Components: Includes DC/AC cables, circuit breakers, surge protectors, etc. Much like starting an online business, proper component selection is crucial for success.
Step-By-Step Solar Panel Installation Process

1. Site Assessment and Panel Placement
Tools Needed:
- Compass
- Inclinometer or smartphone with level app
- Measuring tape
- Ladder
Steps:
Find the best location for your panels:
- In Nigeria, face panels south for maximum efficiency.
- • The typical optimal tilt angle in Nigeria is 10-15° (depending on your location).
- Avoid areas with shade from trees, buildings, or other obstructions.
- Consider roof strength, accessibility, and wind exposure.
Measure available space and determine how many panels will fit.
- Standard 300W panel dimensions: approximately 1.6m × 1m
- Allow for spacing between panels (about 2-5 cm).
Check roof integrity—Nigerian roofs vary widely in structure and material:
- Metal roofs: Ensure no excessive rust or weak points
- Concrete roofs: Check for cracks or water damage.
- Consider reinforcement if necessary.
Like creating innovative solutions, proper site assessment requires creativity and practical thinking.
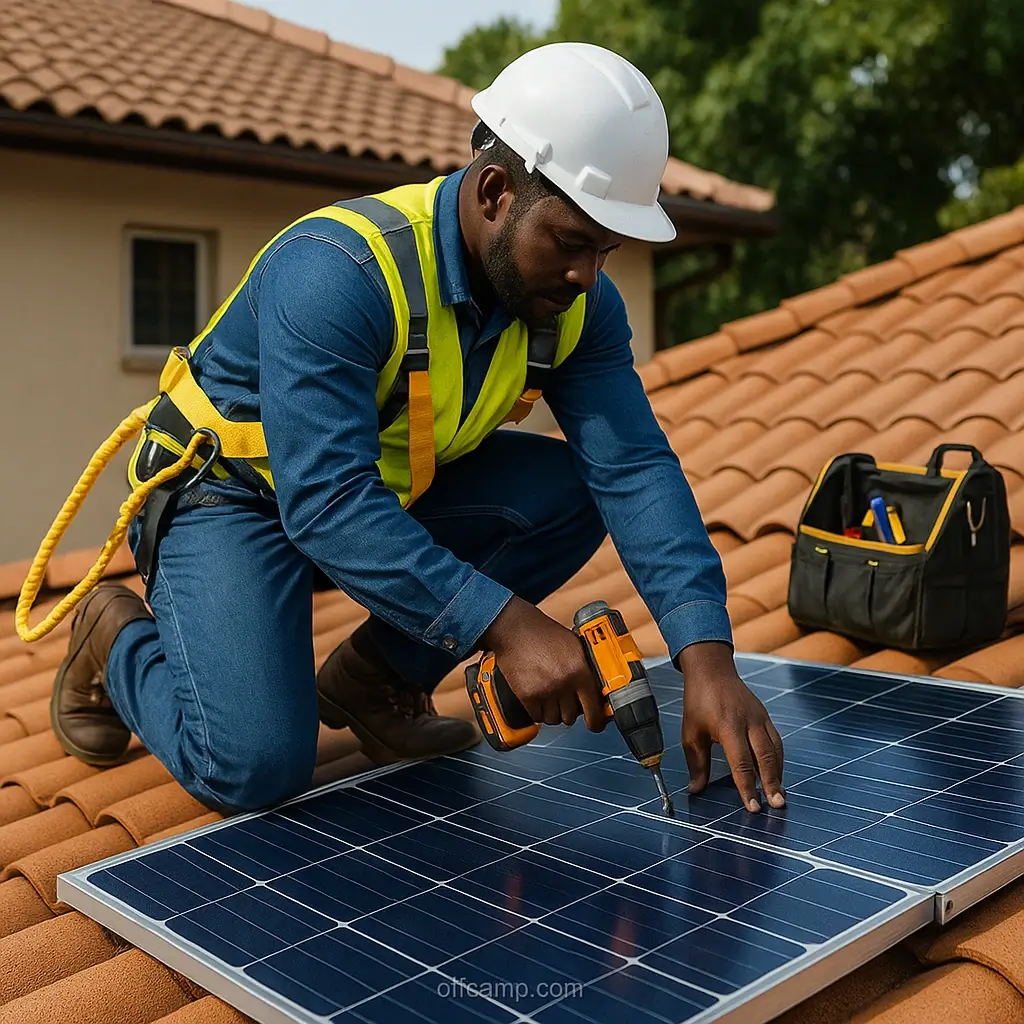
2. Installing the Mounting Structure
Tools Needed:
- Power drill with masonry and metal bits
- Wrench set
- Screwdriver set
- Hammer
- Level
- Safety harness (for roof installations)
Steps for Roof Mounting:
- Mark mounting points on the roof, ensuring they align with rafters or trusses.
Install roof anchors appropriate for your roof type:
- For metal roofs: Use special clamps that attach to the seams.
- For concrete roofs: Drill and install expanding bolts with waterproof sealant.
- Attach mounting rails to the anchors.
- Ensure rails are level and properly aligned.
- Seal all roof penetrations to prevent leaks during Nigeria’s rainy season.
Steps for Ground Mounting:
- Dig holes for concrete footings (60-90cm deep)
- Pour concrete and insert mounting poles
- Allow concrete to cure (at least 48 hours).
- Attach mounting structure to poles
- Ensure structure is level and secure.
Building a solid foundation for your solar system is similar to establishing a solid platform for any business venture.
3. Solar Panel Connection Diagram and Wiring
Tools Needed:
- Wire cutters/strippers
- Crimping tool
- Multimeter
- Electrical tape
- Heat shrink tubing
- MC4 connector tools
Steps:
- Arrange panels on the mounting structure.
- Secure panels with the provided clamps and hardware.
- Wire the panels according to your system design:
- Series connection: Connect the positive terminal of one panel to the negative of the next (increases voltage).
- Parallel connection: Connect all positive terminals together and all negative terminals together (increases current).
- Series-parallel: A combination of both (increases both voltage and current)
- Follow proper wiring diagram:Panels → DC Disconnect → Charge Controller → Batteries → Inverter → AC Disconnect → Distribution Panel
- Use appropriate cable sizes based on current:
- Main DC lines: typically 10-6 AWG
- AC output: typically 8-4 AWG
- Ground wires: typically 8-6 AWG
- Install lightning arrestors—crucial in Nigeria’s tropical climate where lightning strikes are common.
Just as planning a profitable business requires careful consideration, so does proper solar panel wiring.
4. Installing the Inverter and Battery Bank
Steps for Inverter Installation:
Mount the inverter on a wall near the battery bank.
- Ensure good ventilation—Nigerian heat can affect performance.
- Keep away from direct sunlight and rain.
- Allow at least 30cm clearance around the unit for airflow.
Connect the inverter to the battery bank using properly sized cables.
- Follow polarity carefully (red to positive, black to negative).
- Install a DC circuit breaker between batteries and inverter.
Connect the AC output of the inverter to your home’s distribution panel.
- Install an AC disconnect switch.
- Consider using a dedicated sub-panel for solar circuits.
Steps for Battery Installation:
Create a well-ventilated battery area.
- Batteries release hydrogen gas when charging.
- Protection from Nigeria’s high ambient temperatures is essential.
Arrange batteries on a sturdy platform, preferably elevated from the floor.
- Use treated wood or plastic to prevent ground contact.
- Ensure the platform can support the weight (batteries are heavy).
Connect batteries according to your system requirements:
- Series connection: Connect the positive terminal of one battery to the negative of the next (increases voltage).
- Parallel connection: Connect all positive terminals together and all negative terminals together (increases capacity).
Ensure all terminals are tight and protected with anti-corrosion spray or grease.
Like successful entrepreneurs who pay attention to detail, successful solar panel installation requires careful attention to battery and inverter setup.
5. Connecting the Charge Controller
Steps:
Mount the charge controller near the battery bank.
- Must be in a dry, ventilated location
- Keep display visible for monitoring.
Connect in the following order:
- First, connect the charge controller to the batteries.
- Second, connect the solar panels to the charge controller.
- Never connect panels directly to batteries without a charge controller!
Programme the charge controller with the correct battery type and settings.
- Set appropriate voltage cutoffs for Nigerian deep-cycle batteries.
- Configure any additional features (load control, lighting, etc.).
This process is similar to setting up marketing systems—it requires following the correct sequence for optimal results.
6. System Testing and Commissioning
Steps:
Check all connections for proper polarity and tightness.
Verify voltages at different points in the system:
- Solar panel array output (in full sun)
- Battery bank voltage
- Inverter input and output
Test the inverter by connecting a small load.
- Check for clean sine wave output if using a pure sine wave inverter.
- Verify automatic switchover if using a hybrid system.
Monitor the system for at least a full day-night cycle.
- Check charging current during peak sun hours.
- Verify battery voltage remains within safe limits.
- Ensure the inverter handles varying loads efficiently.
Testing your solar panel installation is crucial, just like testing digital marketing strategies before scaling them.
Safety Considerations for Nigerian Installations
Lightning Protection:
- Install a proper grounding system.
- Use lightning arrestors on DC and AC sides.
- Consider additional surge protection for sensitive equipment.
Weather Considerations:
- Ensure mounting can withstand Nigeria’s strong seasonal winds.
- Provide proper drainage for heavy rainfall periods.
- Use UV-resistant cables and conduits for Nigeria’s intense sunlight.
Security Measures:
- Consider anti-theft mounting for panels.
- Install the system in a secure location.
- Use lockable inclosures for batteries and electronics.
Security is essential, just as it is when setting up online payment systems for your business.
Maintenance Requirements for Solar Installations
Regular Maintenance Schedule
Daily Checks:
- Monitor system performance via the charge controller display.
- Check for error indicators.
- Verify battery voltage levels
Monthly Tasks:
- Clean solar panels (especially important during harmattan season)
- Check and tighten all connections.
- Inspect batteries for signs of bulging or leakage.
- Test inverter with varying loads
Quarterly Tasks:
- Clean battery terminals and apply anti-corrosion treatment.
- Inspect roof mountings and seals
- Check all wiring for signs of wear or animal damage.
- Trim any vegetation that might be growing to shade panels.
Annual Maintenance:
- Professional inspection of the entire system
- Capacity testing of batteries
- Cleaning of electronic components (dust buildup is common in Nigeria)
- Testing of all safety systems
Regular maintenance is key to longevity, much like consistent effort is needed for affiliate marketing success.
How to Clean Solar Panels in Nigeria
Proper cleaning is essential, especially during dry, dusty periods:
- Clean early morning or evening (when panels are cool).
- Use soft water (rainwater if available) and mild soap.
- Use a soft cloth or sponge—never abrasive materials.
- Rinse thoroughly to prevent soap residue.
- Clean more frequently during harmattan when dust is prevalent.

Common Installation Mistakes to Avoid
- Undersizing the system: Always calculate needs accurately and add a buffer.
- Poor cable management: Use proper cable sizes and protection.
- Inadequate ventilation: Electronics and batteries need cooling in Nigeria’s climate.
- Improper roof sealing: The rainy season can cause major leaks if roof penetrations aren’t properly sealed.
- Incorrect panel orientation: Panels should face south and be angled properly.
- Mixing battery types or ages: Use identical batteries manufactured at the same time.
- Neglecting surge protection: Nigeria’s grid power can have dangerous surges.
Avoiding these mistakes is similar to avoiding common business pitfalls when starting a new venture.
Frequently Asked Questions About Solar Panel Installation
For a 3.5kVA inverter in Nigeria, you’ll typically need 8-12 panels of 300W each (2.4-3.6kW total), depending on your daily energy consumption and sunshine hours.
Solar panels connect to the inverter via a charge controller, which regulates the voltage and current. The connection sequence is: solar panels → charge controller → batteries → inverter.
The best method depends on your roof type. For metal roofs, use special clamps that don’t require penetration. For concrete roofs, use expanding bolts with proper waterproofing. Always ensure the mounting system can withstand local wind conditions.
To connect panels in parallel, join all positive terminals together and all negative terminals together. This maintains the same voltage but increases the current output.
Installation costs typically range from ₦100,000 to ₦300,000 depending on system size and complexity, in addition to the equipment costs.
Learning solar panel installation skills can create new opportunities for income generation, similar to learning digital skills.
Conclusion
Having a solar power system installed in Nigeria gives you consistent electricity and saves you money over the long term. Getting things started involves a bit of work and some careful setup, but the pros easily outweigh the cons. Through this extensive installation guide for solar panels, you can make sure that your system is safe, efficient, and built to last under Nigeria’s weather conditions.
Keep in mind that you can install solar panels yourself if you have technical skills, although for a larger system or if you have any doubts, a professional installer would be a good idea. Good installation guarantees the best functioning, longevity and security of your solar power investment.
In Nigeria, learning how to install solar panels can be quite useful. It gives you energy independence. It can also be a money spinner for anyone who possesses the expertise. As more Nigerians seek sustainable energy solutions, quality solar panel installation services will always be in demand.
